
Your VPN app says "Connected." But connected does not mean protected.

We tested 14 VPNs at Privaroo. Nine of them leaked real IP data despite showing a green "Connected" badge in the app. A VPN that leaks your DNS queries or exposes your real IP through WebRTC is doing essentially nothing -- your ISP and any website you visit can still see exactly who you are and where you are connecting from.
This guide walks through five tests you can run right now, using free tools, with no technical background required. Each test takes two to three minutes. Total time: under 10 minutes.
A VPN leak test is a set of checks that verifies whether a VPN is actually hiding a user's real IP address, DNS queries, and browser-level identifiers. The four main leak types are: IP address leaks (the real IP is visible instead of the VPN server IP), DNS leaks (DNS queries reach the ISP's servers instead of the VPN's), WebRTC leaks (the browser's peer-to-peer protocol exposes the real IP), and IPv6 leaks (the IPv6 address bypasses the VPN tunnel entirely). In testing conducted by Privaroo across 14 VPN providers, 9 out of 14 failed at least one of these four checks. A VPN can show a "Connected" status while still leaking on all four vectors. Passing all four leak tests is the minimum bar for calling a VPN privacy-effective.
What You Will Need
No downloads required. All five tests use free, browser-based tools:
- ipleak.net -- all-in-one IP, DNS, WebRTC, and IPv6 check
- dnsleaktest.com -- dedicated DNS leak test with extended mode
- browserleaks.com/webrtc -- isolated WebRTC leak check
Have your VPN app open and ready. If you have not settled on a provider yet, see our results from testing the best VPNs in 2026 -- those are the ones that passed every check below.
Test 1 -- Check Your IP Address (30 Seconds)
The most basic check. If this one fails, nothing else matters.
Before you connect:
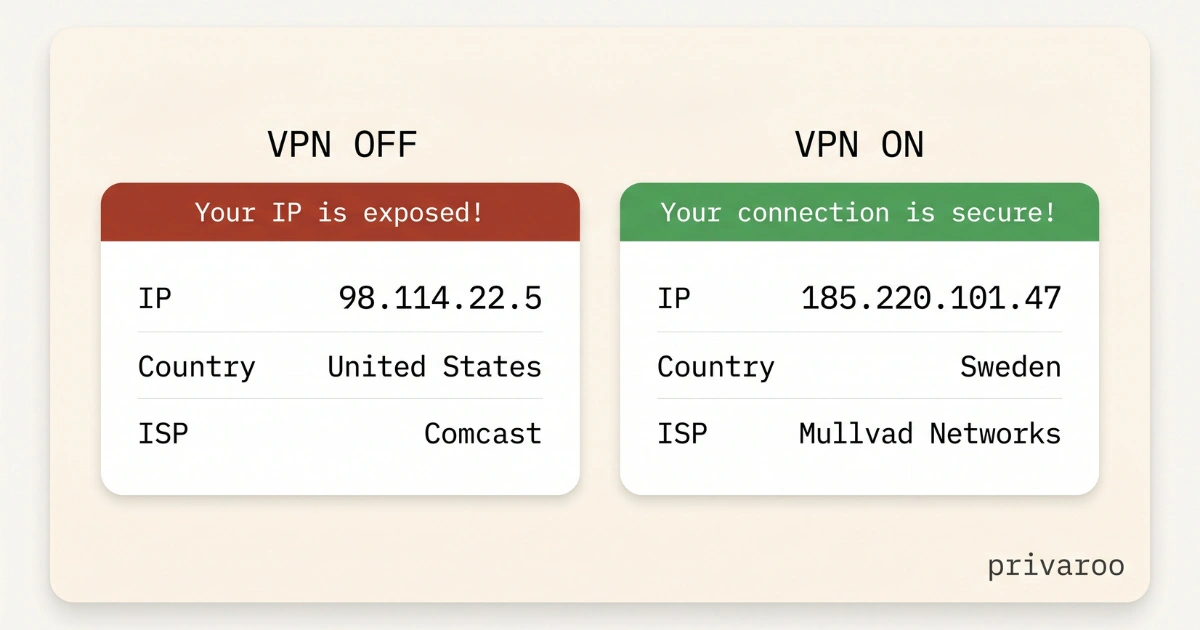
- Open ipleak.net in your browser with the VPN off.
- Note the IP address shown under "Your IP addresses." Write it down or take a screenshot.
- Also note the country and ISP listed. This is your real location as any website sees it.
After you connect:
- Connect your VPN app to any server.
- Refresh ipleak.net.
- The IP address should now be different. The country should match the server location you chose. The ISP should display your VPN provider, not your home internet provider.
What a pass looks like: A completely different IP from the one you recorded, with a location matching the VPN server you selected.
What failure looks like: Your original IP still appears. This means the VPN tunnel did not establish correctly. Try disconnecting and reconnecting, then try a different server. If the problem persists across multiple servers, reinstall the app.
Test 2 -- Run a DNS Leak Test
A DNS leak is the most common VPN failure mode we see.
When you type a URL into your browser, your device sends a DNS query to translate that domain name into an IP address. If your VPN does not route those queries through its own encrypted servers, they travel to your ISP's DNS servers instead. Your ISP then has a complete log of every domain you visit, even while your VPN appears active.
How to test:
- With your VPN connected, go to dnsleaktest.com.
- Click "Extended Test" -- the standard test misses some leak patterns.
- Wait 30 to 60 seconds for results.
- Check the "ISP" column in the results table.
Pass: Every row shows DNS servers belonging to your VPN provider. The country matches your connected server location.
Fail: Any row shows your real ISP name (Comcast, AT&T, Verizon, Spectrum, etc.) or your home country when you are connected to a foreign server.
A DNS leak occurs when a VPN fails to route DNS queries through its own encrypted tunnel, sending them instead to the user's ISP or the operating system's default DNS resolver. This exposes the user's full browsing history to their ISP despite the VPN connection appearing active. The most common cause is the operating system's DNS fallback behavior: Windows and macOS automatically query a non-VPN DNS server when the VPN's DNS server is slow or unresponsive. VPN providers that implement a system-level DNS kill switch block all non-VPN DNS traffic entirely, preventing this fallback. In Privaroo's testing of 14 VPNs, DNS leaks were the single most frequent failure type, occurring in 6 out of 14 providers tested -- making it the most important individual check to run.
If you want to go deeper on how to fix DNS leaks on Windows, macOS, and iOS, our 5-minute VPN leak test guide covers the manual fix steps for each platform.
Test 3 -- Check for WebRTC Leaks
WebRTC is a browser API that enables peer-to-peer features like video calls. The problem: it can reveal your real IP address to any website that uses it, even when your VPN is active and passing every other test.
This catches a lot of users off guard. Chrome, Firefox, Edge, and Brave all have WebRTC enabled by default. Your VPN encrypts the traffic leaving your machine, but WebRTC communicates device IPs at the browser level before that tunnel is involved.
How to test:
- With your VPN connected, go to browserleaks.com/webrtc.
- Look at the "Public IP Address" section.
Pass: The only public IP shown matches your VPN server's IP address. No additional addresses appear.
Fail: Your real home IP address appears alongside the VPN IP. Any site that uses WebRTC can read that real IP.
How to fix a WebRTC leak:
The most reliable fix is to enable WebRTC blocking inside your VPN app -- NordVPN and Mullvad both have this as a toggle. The second option is the uBlock Origin browser extension: go to its settings and enable "Prevent WebRTC from leaking local IP addresses." Avoid relying on browser-level WebRTC disable settings; they are inconsistent across browser versions.
Test 4 -- Test for IPv6 Leaks
Most residential internet connections still use IPv4. But if your ISP has assigned you an IPv6 address (increasingly common in the US) and your VPN does not handle IPv6 traffic, that address leaks in plain text alongside your encrypted IPv4 traffic.
IPv6 addresses are typically static and tied directly to your account with your ISP. A single IPv6 leak can fully identify you even if every other VPN check passes.
How to test:
- With your VPN connected, go back to ipleak.net.
- Scroll to the section labeled "IPv6 leak test" or check whether any IPv6 addresses appear in the main IP list.
Pass: No IPv6 address appears, or the IPv6 address belongs to your VPN provider.
Fail: Your real IPv6 address appears -- which you can verify by comparing it to what ipleak.net showed with the VPN off.
The simplest fix: Use a VPN that blocks IPv6 by default. Mullvad, ProtonVPN, and NordVPN all do this. In our Mullvad review, we found it was the only provider that handled IPv6 blocking correctly out of the box with no settings required.
If your current VPN does not have IPv6 blocking, you can disable IPv6 in your OS network adapter settings directly as a workaround.
Test 5 -- Verify the Kill Switch Works
The kill switch cuts your internet if the VPN drops unexpectedly. Without it, a brief VPN disconnect -- from a sleep cycle, a server switch, or an unstable connection -- exposes your real IP for a window of seconds or minutes.
Independent kill switch testing published in early 2026 found that only 16 out of 30 VPN providers tested had kill switches that functioned correctly. The other 14 let traffic through during a reconnect window.
How to test:
- Connect your VPN and confirm the IP on ipleak.net matches the VPN server.
- Make sure the kill switch is enabled in your VPN app settings -- it is off by default on some providers.
- Force-drop the connection by disabling your Wi-Fi or ethernet adapter for five seconds, then re-enable it.
- Immediately try to open ipleak.net during the reconnect window.
Pass: The page fails to load entirely. No IP address is returned. Your internet is blocked until the VPN is back.
Fail: The page loads and shows your real IP before the VPN reconnects.
Note: on mobile, kill switch testing is more complicated. iOS restricts what VPN apps can do in the background, and kill switch behavior on iPhone differs significantly from desktop. See our guide on the best VPNs for iPhone for what to look for on iOS specifically.
What to Do If Your VPN Is Leaking
If any test above failed, work through these steps in order:
- Switch servers. A single misconfigured server can fail tests that others pass.
- Enable all privacy settings. Check that DNS leak protection, kill switch, and IPv6 blocking are all active in the app -- they are often off by default.
- Switch VPN protocols. WireGuard leaks less than OpenVPN or IKEv2 in our testing. If your app supports both, switch to WireGuard.
- Reinstall the app. A clean install clears most configuration corruption.
- Switch providers. If the VPN still leaks after all of the above, the problem is architectural. Our best VPNs 2026 guide covers the only ones that passed every test we ran.
For evaluating whether a provider is worth switching to, the criteria that actually distinguish safe from unsafe are covered in our how to choose a VPN guide.
FAQ
How do I know if my VPN is actually hiding my IP?
Check ipleak.net before and after connecting. If the IP address and ISP name change, and the location matches your selected VPN server, your real IP is hidden. If your original IP still appears after connecting, the tunnel is not working.
Can a VPN pass the IP test but still leak?
Yes. A VPN can mask your IP while still leaking DNS queries, WebRTC traffic, or IPv6 addresses. In our testing, several providers passed the basic IP check but failed the DNS or WebRTC test. Run all five checks -- not just the IP test.
What is the fastest single check I can run?
Go to ipleak.net with your VPN connected. It runs IP, DNS, WebRTC, and IPv6 checks simultaneously on one page. If everything there looks clean, run the dedicated extended DNS test on dnsleaktest.com as a secondary confirmation.
Do free VPNs pass these tests?
Most do not. In our testing, free VPN tiers (excluding ProtonVPN Free, which passed) consistently failed at least one leak test. Logs and data collection are a separate concern from leaks. See our breakdown of free vs paid VPNs for the full comparison.
Should I run these tests every time I connect?
Run them once during initial setup and again after any major app update. If you use public Wi-Fi regularly, a quick IP check each time you connect is worth the 30 seconds. The full five-test suite is worth re-running quarterly.
Key Takeaways
- "Connected" in the app does not mean the VPN is protecting your traffic.
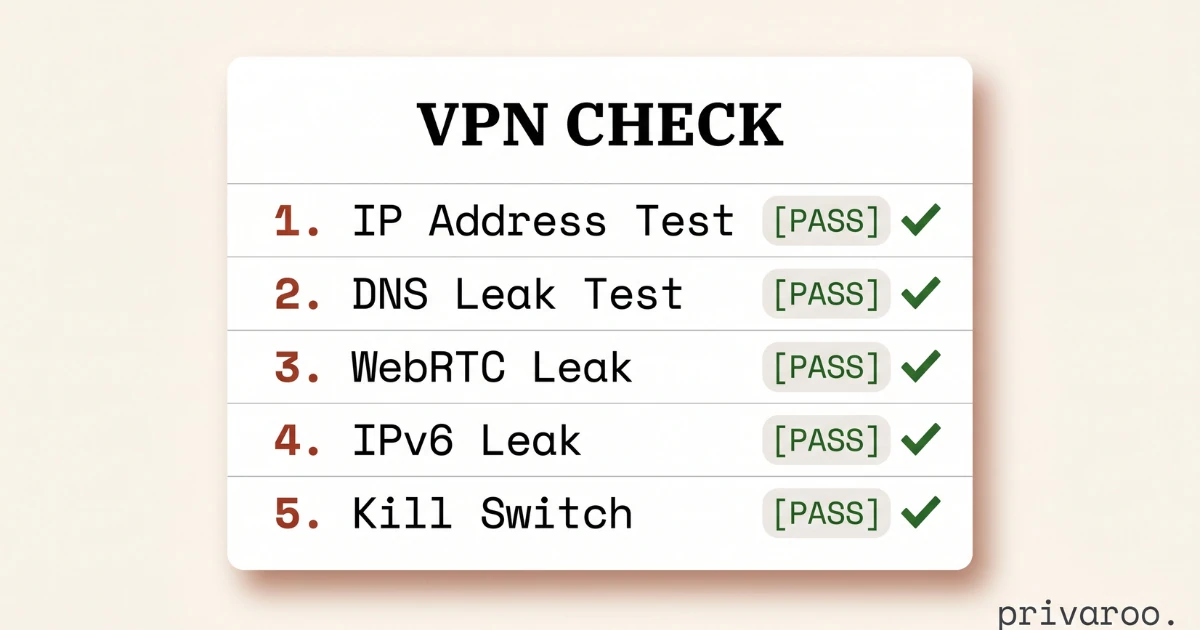
- Run all five tests: IP check, DNS leak, WebRTC, IPv6, kill switch.
- DNS leaks are the most common failure -- always run the Extended Test on dnsleaktest.com.
- Use a VPN with IPv6 blocking and a verified functioning kill switch.
- If a VPN fails any test after reinstalling and switching servers, switch providers.